Saturday, December 31, 2016

Most Viewed Blog Post of 2016 - #1 - A Great Mixture to Keep Weeds Out of Infields and Tracks

Well, here it is, the most viewed blog post of 2016 is:

#1 -A Great Mixture to Keep Weeds Out of Infields and Tracks. 

Thanks again for a great 2016.  Looking forward to 2017!  Cheers!

With summer now upon us, many high school playing surfaces are winding down from spring play, now crabgrass, goosegrass, and other unwanted growth will appear.


How do you control this issue?  See below:

A simple mixture of Glyphosate in a 2% solution and SureGuard at 3 teaspoons per 1000 sq ft. So, in a 3 gallon spray hand can, 7.68 ounces of Glyphosate and 9 teaspoons of SureGuard. The tank will cover 3,000 sq ft. How well does it work? The photos below are from the warning track at Brebeuf High School. The track was sprayed in March.


Note the weeds along the track edge. This is due to the application. As many of you know, Glyphosate is a non-selective herbicide, meaning it will kill anything it touches. So, be careful along all grass edges. Finally, to get better control, try not the work the infield/track up as this will break the Sureguard barrier.

To learn more about Glyphosate, click HERE.

To learn more about Sureguard, click HERE.

Go to j-dturf.com to learn more about J&D Turf.

Play on!
--Jamie

Most Viewed Blog Posts of 2016 - #2 - Wheels on Soccer Goals

As we wrap up 2016 and look forward to 2017, let's look at the most viewed posts from 2016.

At #2 - Wheels on Soccer Goals

A quick post from Covenant Christian High School . Andy Gossel and his staff do a great job to provide some of the best baseball and soccer surfaces in the state of Indiana.  One of Andy's tricks is that all the soccer goals at CCHS are on wheels. After practice all the goals are moved off the field, and during practices the goals are moved to alleviate turf wear in the goalie box.


Notice the locations of the goals on the photos.  Yes, CCHS practices boys soccer on the baseball outfield with great success.  Bottom line, natural grass can take a tremendous amount of traffic if the field is under a great management program and traffic is rotated.

Go to j-dturf.com to learn more about J&D Turf.

Play on!
--Jamie
@JamieMehringer

Most Viewed Blog Posts of 2016 - #3 - Do Not Layer Infield Mixes

As we wrap up 2016 and look forward to 2017, let's look back at the most viewed blog posts from 2016.

#3 - Do Not Layer Infield Mixes

This week I was at a high school that was have issues with their infield.  I asked the AD if he new what type of material he was using.  He said he didn't but he paid a contractor to add infield mix to his field a year or two ago, so we dug a hole to take a look.  Here is what we found:


Needless to say the layering is causing an issue as well as using an infield mix that is high in silt and fine sand.  Click HERE to see an earlier post on layering infield mixes.

Click HERE to see how to add infield mix to an existing infield.

Go to j-dturf.com to learn more about J&D Turf.

Play on!
--Jamie
@JamieMehringer

Building a Set of Base Anchors - Do Not Use Coffee Cans

I was on the road last week renovating an infield when I came across this base anchor


SmartTurf Tip - Do NOT use coffee cans for base anchors.  The have a tendency to spin and are not the recommended method. 

Below is the recommended method for constructing base anchors.

Building a set of base anchors is a task that can be completed by a grounds manager or coach.  Here is a step by step method for building a set of base anchors.

1.  Organize the parts and the tools.  Items needed:

  • Base anchors
  • Duct tape
  • Screws
  • Drill
  • Tape measure
  • Circular saw
  • Scrap lumber 2x4 
  • Shovel
  • Quikrete
  • Wheelbarrow


2. Cut the scrap lumber into 8-12 inch pieces, and build a simple square form.   Keep in mind that this is not cabinet grade carpentry.  


3.  Tape the bottom of the anchors while mixing the Quikrete.  Using a scrap piece of plywood as a base, place an anchor in each form.  


4.  After the Quikrete cures (no more than 4 hours) remove the forms.  Now, you have a new set of base anchors.


Go to j-dturf.com to learn more about J&D Turf.

Play on!
--Jamie
@JamieMehringer

Most Viewed Blog Posts of 2016 - #5 - What Makes up a Mix?

As 2016 comes to a close and 2017 begins, let's continue our look back at the most viewed blog posts of 2016.

#5 - What Makes up a Mix?


For years, building and maintaining baseball/softball infields was considered an art. What one groundskeeper thought was a great infield, another thought it was a poor infield. 

The process was subjective and creative. How many times have you heard, “I’m looking for some black dirt.” Or, “I’m looking for some red clay.” Times are changing and the tide is turning to science. Why?

Simply stated, when the process is a science, soils are tested and results can be predictable, and replicable.

Three components of good infield mix:
  1. The deepest part of the profile is a compacted native soil sub base that is 3-6 inches below the surface.
  2. The infield mix exists. The mix is the “meat” of the infield. The material is usually engineered, imported, compacted firmly, and has surface drainage.
  3. 3.1/8-1/4 inch of topdressing rests on the surface much like mulch.
Infield mixes have three components: sand, silt, and clay. 

Sand, the largest soil particle, provides the structural integrity of the infield. The targeted range is 58-75% and over 50% of the sand should be retained on the medium sieve.
 

Silt, the second largest soil particle, acts as a bridge between the sand and the clay. 10-35% is the acceptable range.
 

Clay, the smallest soil particle, provides the color of the mix and retains moisture. 15-35% is the acceptable range.
 

The take home message on silt/clay is that the ratio of silt/clay should NEVER be higher than 1:1.

So, what makes a good mix? Three important factors: traction, playability, and consistency.
 

A mix should provide consistent traction, the ability for athletes to play the game without sliding/slipping around the infield. The infield should play consistently in a variety of weather conditions.
 

How many time have you heard, “I hope it doesn’t rain, we will be shut down for 3 days!”
 

When all the characteristics are achieved, the infield is considered a “balanced soil.”


Play on!
--Jamie
@JamieMehringer 


Download the printable Smart Turf sheet - Infield Mixes: What Makes Up a Mix?

The original post can be viewed here.

Most Viewed Blog Posts of 2016 - #6 - Backstop Wall Drainage

As 2016 comes to a close and 2017 begins, let's continue to look back at the most viewed blog posts of 2016

#6 - Backstop Wall Drainage

Back to the topic of drainage.  In this post, we look at drainage along a backstop wall.  Often, a new brick or solid surface wall is constructed with little to no consideration to drainage.  Obviously, a solid wall will need drainage to move water.  A french drain can be installed, but I prefer not to have gravel on the surface of a warning track or full infield softball surface as illustrated below.


The best option is a channel drain.

Let’s go the the MLB/P&G Cincinnati Reds Urban Youth Academy.  The complex constructed in fall 2013 and opened in spring 2014.  The goal of the installation was to ensure water moved off the warning track.  Channel drains were installed and tied into the drainage from the wall.  Finally a heel proof cover was added.  Problem solved!  To be clear, the drainage supplier was requiring that the drain be installed with 4 inches of concrete on both sides of the drain in the event of a vehicle driving over the drain.  Needless to say, this was removed due to the fact that you cannot drive over the drain.  No issues after 2+ years of play/maintenance.


Go to j-dturf.com to learn more about J&D Turf. 

Play on!
--Jamie
@JamieMehringer

Wednesday, December 21, 2016

Most Viewed Blog Posts of 2016 - #7 Growing Degree Day Tracker for Crabgrass Pre-Emergent Applications

As 2016 comes to a close, we look back at the most viewed blog posts of 2016.  #7 is Using a GDD Tracker for Applications.

Exceptional spring warm is present across the Midwest.  Due to this, spring applications are weeks ahead of schedule.  A grounds manager can track growing degree days (GDD), but the easiest way to follow the GDD progress is to use the Growing Degree Day Tracker  brought to you by the Midwest Regional Turf Foundation and Purdue Turfgrass.   This tool is a great way to assist you decision making on crabgrass control applications and many other applications of time sensitive products.


Go to j-dturf.com to learn more about J&D Turf.

Play on!
--Jamie
@JamieMehringer

Wednesday, December 14, 2016

Most Viewed Blog Posts of 2106 - #8 - How to Add New Mix and Level Baselines

As 2016 comes to a close, we look back at the most viewed blog posts in 2016.  #8 - How to Add New Mix and Level Baselines

Maintaining baselines that create a smooth and safe surface can be challenging. The photos below outline the process of adding new material to baselines. This leveling process will work on any baseball surface. Keep in mind, if leveling with a board, address all “lips” before grading.

Step 1 Edge the sod to create clean edges (address any “lips” as well). Then, add infield mix to the baselines and, using a 2x4 screed board, level the next material.


Step 2 Till the new material into the existing material. Ideally, the tilling depth is 3-4 inches. In this example, Dura Edge Pro was added/tilled to existing Dura Edge Pro baselines.


Step 3 Re-screed the tilled material.


Step 4 Using a 3 ton dual drum roller, roll the baselines.


Step 5 Add conditioner and drag.


This entire project for both baselines took approximately 3 hours.

Now the baselines are level and create smooth transitions between the turf and the infield mix.

Play on!
--Jamie
@JamieMehringer


Download the Smart Turf Sheet - How to: Add New Mix and Level Baselines

The original post can be viewed here.

Sunday, December 11, 2016

Most Viewed Blog Posts in 2016 - #9 - A Tale of Two Walk Ups

As 2016 comes to a close, we are looking back at the 10 most viewed blog posts in 2016.  Here is #9....

Walk-ups for baseball and softball fields are often a good option to manage traffic while also allowing for grass in foul territory (softball).  This is sometimes necessary to manage surface drainage/grades.

Let’s look at two walk-ups.  First, the softball field at Ohio Northern University.  As you can see these walk-ups are the same width from the warning track to the plate, so the on-deck circle is off the walk-up.


The next example is at the MLB/P&G Cincinnati Reds Urban Youth Academy.  In this example, the walk-ups are flared out as you get closer to the track.  This allows for the on-deck circles to be on the walk-ups. 


Also, you can see this early season photo also illustrates how walk-ups can aid in surface drainage.

Which is the best option?  That’s a field manager’s decision.  I personally like the flared walk-up which allows for space for the on-deck circle.

Go to j-dturf.com to learn more about J&D Turf.

Play on!
--Jamie
@JamieMehringer

Tuesday, December 6, 2016

Most Viewed Blog Posts in 2016 - #10 - Infield Mix Mix Drainage for Baseball and Softball

As 2016 quickly arrives to a close, we take our yearly look back at the Top 10 most viewed blog posts in 2016.  Below is #10 -  Infield Mix Mix Drainage for Baseball and Softball

Infield drainage is typically a topic for discussion anytime I give a presentation on infield mixes, grades, etc.  So, when the J&D Turf team was tasked to remedy an infield drainage issue at University of Indianapolis, the team chronicled their work with photos.

Before we get to the photos, lets lay out a couple of items in regards to infield drainage:
1.     Do NOT install drain tiles under the infield mix.  The infield mix should be engineered and maintained to eliminate downward movement (percolation) of water.  All water during rain events should run off the infield.
2.     Due to item #1, positive surface drainage must be achieved on ALL infields.  For baseball and softball, surface drainage should be between .5% and 1%.  Keep in mind, if a softball field does not have sod in front of dugouts, surface drainage should be NO MORE than .5%.  Does your infield conditioner run off your infield?  Chances are, the infield has surface drainage exceeding the limits listed above.
3.     Purchase and manage a good infield mix.  Be careful when purchasing infield mix!  To learn more about infield mixes, click HERE and HERE.

So, lets explain what the existing conditioners were at Baumgartner Field at University of Indianapolis:
1.     Native soil.
2.     Due to existing topography, the grade falls from the RF foul pole to the 3rd base dugout.
3.     Bluegrass/Ryegrass surface
4.     Infield Mix - Dura Edge Classic 
5.     Conditioner - Diamond Pro Professional Calcined Clay
6.     Mound Clay - Dura Pitch Mound Clay 
7.     During rain events, water would run from RF under the tarp and become trapped.

The solution:

Install a six-inch wide trench:


Next, installation of a 4 inch perforated drain tile and 6 inches of USGA drainage gravel.


Then, installation of 6 inches of USGA rootzone sand all the way to the surface.  Then the existing sod was re-installed.  DO NOT seal off drain tiles by placing native soil over drainage gravel.
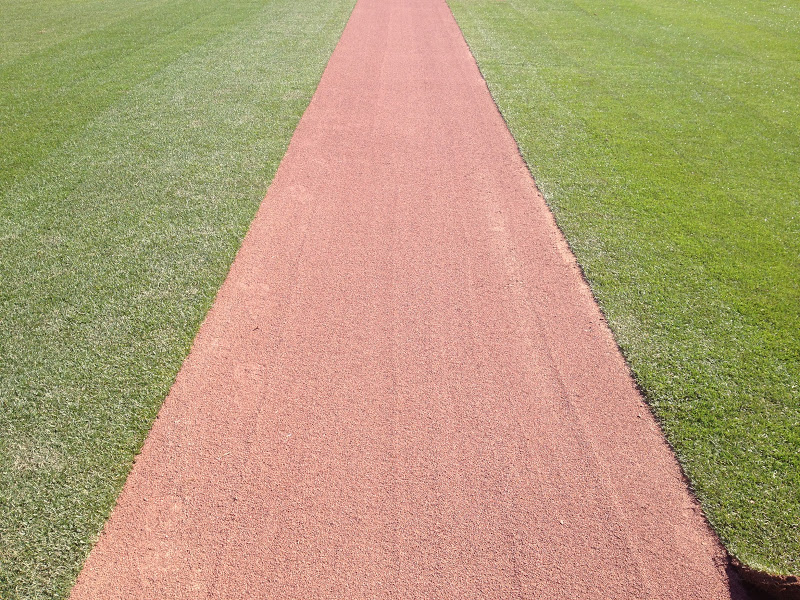


Finally, an edger was used to run across the trench/slit and expose 3 inches of the sand.  The bluegrass will grow into the sand.


The location of the drain tile while the tarp is on the field.


Lastly, the field ready for play the day after installation.


Mission accomplished!

Best of luck to the Lady Greyhounds as they begin the road to the D-II College World Series.

Click HERE to learn more about Dura Edge Classic and Dura Pitch Mound Clay.
Click HERE to learn more about Diamond Pro Professional Calcined Clay.

Click HERE to learn more about UIndy softball

Go to j-dturf.com to learn more about J&D Turf.

Play on!
--Jamie
@JamieMehringer 

Wednesday, November 23, 2016

How Do You Repair a Batters Box?

I get this question numerous times in my travels.  So, let's look into the repair:

First, the plate after the game:


First step, rake the plate with a landscape rake.  Look to lower high areas:


Second step, remove all conditioner and loose clay by using the leveling blade on the rake and a broom:  NOTICE - the use of both a push broom and a standard broom and how clean to sweep the batters box.  NO loose material should be present.


Third step, add water to hydrate the existing clay.  This can be accomplished with a garden hose, watering can, or a sprayer/spray bottle:


Next step, add new mound clay.  In this case Dura Pitch Mound Clay was added:


Then, rake new clay into place and use a flat bladed shovel to chop the new clay into the existing clay:


After adding the clay, lightly compact the clay with your foot and then tamp using a hand tamp:


Then, rake the compacted clay in 3 directions to level the clay.  


Next step, use a small amount of water to hydrate the clay and use your foot to smear the clay together and blend all the seams into one solid piece of clay:


Then, push the existing conditioner to the plate, screen with leaf rake and add conditioner as needed to maintain a 1/4 inch depth of conditioner:


Lastly, finish drag,water and paint the plate.  

Use this program, and your plate area will be the best in your league.

Go to j-dturf.com to learn more about J&D Turf.

Play on!
--Jamie
@JamieMehringer