Thursday, January 31, 2013

High Silt Infields - Dusty When Dragging


Do you have a high silt infield?  Can you barely see the person dragging the field?  You may have a high silt infield.


Click HERE to learn more about Engineered Soil Technology.  

Click HERE to learn more about silt-to-clay ratio (SCR)

Go to j-dturf.com to learn more about J&D Turf.

Play on!
--Jamie
@JamieMehringer

Tuesday, January 29, 2013

Replacing a Pitching Rubber Without a Surveyor


The pitching rubber of a baseball/softball field is an important part of a field.  In this post, I will detail replacing a pitching rubber on a high school baseball field.  To see how to replace a plate, click HERE.

The first step to set up a laser.  Take a reading at homeplate.  Lower the receiver 10 inches to get the correct elevation of the new pitching rubber and install clay to build the base under the rubber.  I have also seen concrete blocks and an additional rubber used to build a base: 


Next, pull string lines from the foul poles through homplate and a string line through the middle of the second base anchor:


Install the new pitching rubber keeping an eye on the following:

  1. Is the string in the middle of the rubber?
  2. Is the elevation correct on the laser?
  3. Is the new rubber 60 ft 6 inches from the apex of homeplate to the front of the rubber?


Once all of those items are established, the next step is to square the rubber up to homeplate.  To do this take readings from the from corners of the plate to the corresponding front corners of the pitching rubber.  The distance should be 59 ft 1 inch.  If that is the case, the rubber is square:


Finally, double check all the dimensions listed above and place a level on the rubber.  If all is correct and level, carefully place mound clay around the rubber and compact.  In this case, Dura Pitch Mound Clay is used.

To see how to renovate a mound on a budget, click HERE:

Go to j-dturf.com to learn more about J&D Turf.

Play on!
--Jamie
@JamieMehringer

Sunday, January 27, 2013

Replacing a Homeplate Without a Surveyor


The homeplate of a baseball/softball field is the point where all other points are based.  (foul poles, bases, pitching rubber, etc)  So, when the time comes to replace a plate, take special care to ensure that the new plate is square with the foul poles and the field alignment is not compromised. 

Let’s walk through a plate replacement.  
First, string lines are pulled from behind the old plate to the foul poles.  This is done before the old plate is removed:


Next, a laser is used to take elevations around homeplate.  I always like to have the homeplate slightly higher than the highest point in the turf.  This will ensure that water will not run back onto the plate during rain events:


A string line is also pulled from behing the apex of the plate, through the middle of the pitchers rubber and the middle of the anchor of 2nd base.  This is the third string to ensure proper alignment.  Keep in mind that when the elevation of the plate in changed, the pitching rubber elevation should be checked and adjusted if necessary:


Finally, carefully install mound clay around the plate making sure that the plate does not move:


To see how to renovate a plate on a budget, click HERE:

Go to j-dturf.com to learn more about J&D Turf.

Play on!
--Jamie
@JamieMehringer 

Thursday, January 24, 2013

Aerifying and Topdressing - Does it Create Sand Columns?


Bottom line - YES.  Here is a photo from the baseball field at Purdue University.  As you can clearly see, sand channels have been created.  Will aerification and topdressing be a piece in your 2013 maintenance program?


Go to j-dturf.com to learn more about J&D Turf.

Play on!
--Jamie
@JamieMehringer

Tuesday, January 22, 2013

Installing Mound Clay in the Batters and Catchers Boxes - Brian Wilson Field


Building a new homeplate can be a time consuming project.  There are different ways to complete the process.  In this case study the following steps were completed:
  • Install the plate - ensure that it is higher than the highest point where the infield mix and the grass meet.
  • Install Dura Edge Classic infield mix at a depth of 4 inches and compact.
  • Layout the batters and catchers boxes and remove 4 inches of the infield mix

  • Install 4 inches of Dura Pitch Mound Clay.
  • Till the plate ensuring that the interface between the mound clay and the infield mix is consistent.  This will sure that there is no distinct line where the two materials meet which will cause issues in wet weather.


  • Level the plate using a 20 foot bleacher section as a screed board.

  • Compact with the tires of a utility vehicle.

  • Repeat as needed to finish the grade

  • Condition with 3-4 bags of calcined clay
To see how to renovate a plate on a budget, click HERE.

Go to j-dturf.com to learn more about J&D Turf.

Play on!
--Jamie
@JamieMehringer

Monday, January 21, 2013

Installing Mound Clay on a Game Mound - Brian Wilson Field


Building a new mound can be a time consuming project.  There are different ways to complete the process.  In this case study the following steps were completed:
  • Install the pitchers rubber 10 inches above home plate
  • Install Dura Edge Classic infield mix at a depth of 4 inches and compact.
  • Ensure the mound is sloped correctly.
  • Layout the high traffic area down the slope of the mound and remove 4 inches of the infield mix. Note: Dura Pitch Mound Clay was installed in front of pitching rubber at the time of pitching rubber installation.


  • Work up the mound using a Mantis tiller ensuring that the interface between the mound clay and the infield mix is consistent.  This will sure that there is no distinct line where the two materials meet which will cause issues in wet weather.
  • Re-slope the mound and level the sides of the mound using screed boards.
 
  • Compact with the tires of a utility vehicle.
  • Repeat as needed to finish the grade.
  • Condition with 3 bags of calcined clay.
To see how to slope a mound and build a cost effective slope board, click HERE.
To see how to renovate a mound on a budget, click HERE.

Go to j-dturf.com to learn more about J&D Turf.

Play on!
--Jamie
@JamieMehringer

Tuesday, January 15, 2013

Building an Off-Field Bullpen - Brian Wilson field


Building a bullpen off the field is on many coaches wish list.  In this post, a construction of an off field bullpen in explained in detail.
First locate the bullpen location and remove the sod.  Keep in mind that all new material has to be installed at a depth of 4 inches.  So, existing native soil may have to be removed along the edges of the new bullpen.


Next, install the pitchers rubbers.  Ensure that the rubbers are 10 inches above home plate, level, and in line with each other. 


After installation, install mound clay in front of the rubbers.  In this case, Dura Pitch Mound Clay from the Natural Sand Company and Dura Edge Products were used.  A local infield mix was used along the sides of the mound, the table, and behind the mound to save costs.

Ensure that the mound is sloped correctly.  To see a trick of the trade for a cost effective slope board, click HERE.

Finish the mound with a 1/4 inch of infield mix over the mound clay to create a clean, smooth surface. 


Finally, condition with 4-5 bags of calcined clay.

Go to j-dturf.com to learn more about J&D Turf.

Play on!
--Jamie
@JamieMehringer

Sunday, January 13, 2013

Softball Infield Grade and Drainage - Martinsville High School


Does your infield conditioner run off the infield during and after heavy rain events?  Do you see erosion of infield mix during and after heavy rain events?  If so, your infield has too much fall/pitch.  As detailed in an earlier blog post, infield drainage should be accomplished with surface drainage, NOT subsurface drainage.

In the case of softball fields, there is no infield grass, but the sq. ft. of the infield is similar to a baseball infield - 10,000 sq. ft. Due to this fact, the fall/pitch on a softball infield has to be soft and very precise.  I recommend softball fields to have a fall/pitch of .3%.  This is due to two main reasons.  One, a grade of .3% will allow for positive surface drainage, but will limit conditioner runoff.  Secondly, due to the lack of a mound in softball, any conical grade more than .3% will create an illusion of a “mound.” 

So, the question I get frequently is: “I have a field that is 10 years old, was not laser graded, and I have severe runoff issues.  What can I do?”

Let’s go to Martinsville High School for a case study in how to address this issue.

Background:

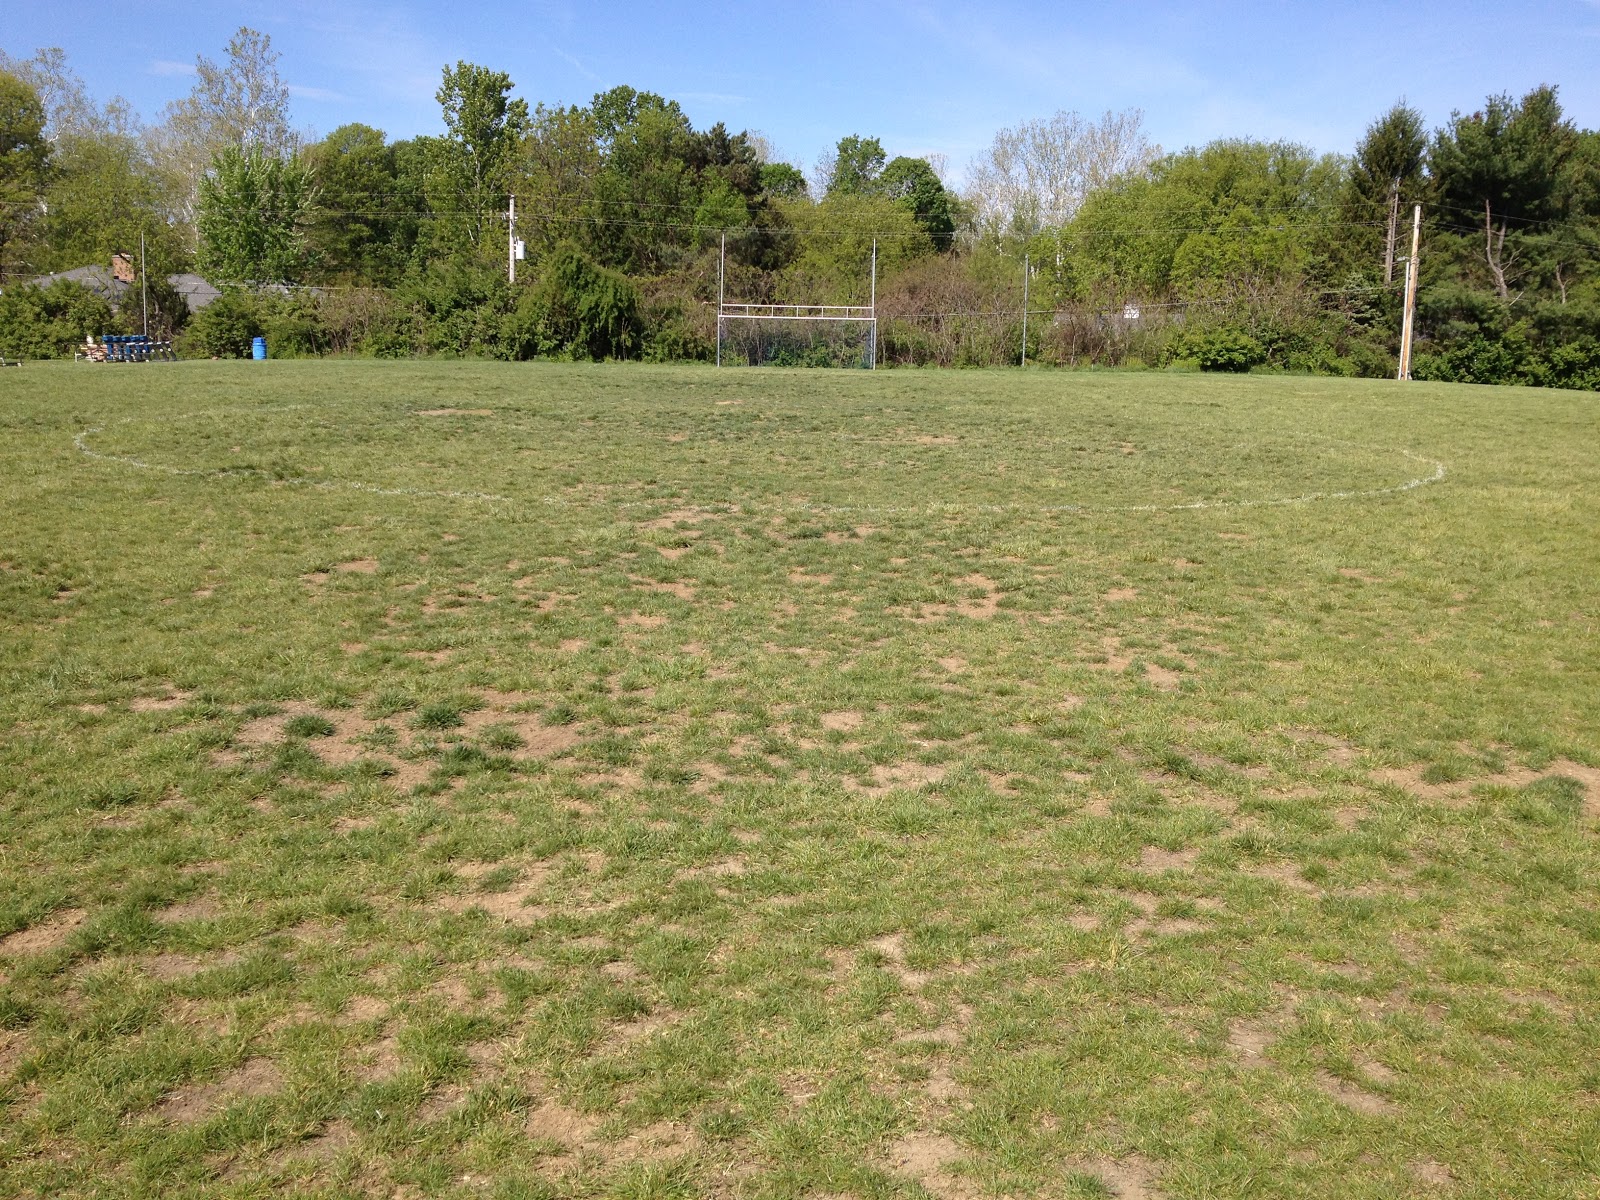
The field was constructed approx. 15 years ago and was not laser graded.  The field falls from the second base position to the third base dugout at a 2% slope.  Needless to say, there is significant runoff issues.  The first base dugout is 15 inches higher than the third base dugout.  The infield has been amended with FieldSaver50 from the Natural Sand Company and Dura Edge Products.

The existing surface before renovation:


The Solution:

Starting over and rebuilding the dugouts and grading the infield with a conical laser is not an option.  So, the plan is to soften the grade to .3% across the infield from the second base position to 5 feet past the third base line.  Then the grade will fall at a 2% grade from the point 5 feet past the baseline to the dugout.  Infield mix in front of the dugouts will be removed, six inches of topsoil installed as well as irrigation.  The runoff will be eliminated with the installation of sod.  Problem solved.  Sod was installed in front of the first base dugout as well to balance the look of the field.  Sod was placed up to the dugouts.  Spring traffic patterns will be studied and small warning track “pads” will be installed in from of the dugout entrances.

The existing field, after renovation:


Bottom line, sometimes thinking outside of the box is necessary to create well draining fields that do not require a complete field renovation.

Go to j-dturf.com to learn more about J&D Turf.

Play on!
--Jamie
@JamieMehringer

Friday, January 11, 2013

Parks and Recreation Departments Benefit from Sports Tourism

I ran into an interesting article from Athletic Business.  To see the article, click HERE.

The article details many cities and towns, including Elizabethtown, KY, and the Elizabethtown Sports Park.  Do you think hosting tournaments is good for communities?


Go to j-dturf.com to learn more about J&D Turf.

Play on!
--Jamie
@JamieMehringer

Wednesday, January 9, 2013

MRTF - Green Expo Today - Friday

If you reside in the midwest, Please consider attending the Indiana Green Expo today - Friday at the Indiana Convention Center.  To learn more about the event, click HERE.

The Expo is the main funding event for the Midwest Regional Turf Foundation which supports turfgrass research at Purdue University.  To learn more about the MRTF, click HERE.


Go to j-dturf.com to learn more about J&D Turf.

Play on!
--Jamie
@JamieMehringer


Sunday, January 6, 2013

Dolphin Stadium Web Cam - BCS Championship

Dolphin Stadium will host tomorrow night's BCS Championship Game between Alabama and Notre Dame.  HERE is a link to the stadium web cam.  Look to the right of the image to start a 24 hour time lapse.

photo courtesy of: architecture.about.com

Go to j-dturf.com to learn more about J&D Turf.

Play on!
--Jamie
@JamieMehringer

Thursday, January 3, 2013

A Final Recap from St Luke - Patriot Bermudagrass


We have followed the bermudagrass field at St Luke during 2012.  From the beginning of the project, through the season.  Here are the links of the blog posts:


Overall, the field performed very well.  As you can see, the overseeding took a beating in the high traffic areas, but there is still plenty of bermudagrass for 2013.  After all, the overseeding consisted of one application of Turf Star Elite Ryegrass at a rate of 20 lbs per 1,000 sq ft in early Sept.  The goal of a smooth surface with no mud was achieved during a fall in central Indiana that saw frequent rainfall on Friday nights - the day before the most heavy use.  

Here are two photos.  The first was the tall fescue surface after play from 2011 (taken early spring 2012).  The next is the overseeded Patriot field after play this year (taken mid December)


Here are two photos showing the different traffic patterns and how the traffic effects the overseeding success.


Moving forward, if the budget allows, more frequent and light overseeding would allow for more ryegrass cover in the high traffic areas.  

I will continue to cover this field in 2013.

Go to j-dturf.com to learn more about J&D Turf.

Play on!
--Jamie
@JamieMehringer