Tuesday, April 12, 2011

Indiana State University - A Tale of Two Infields

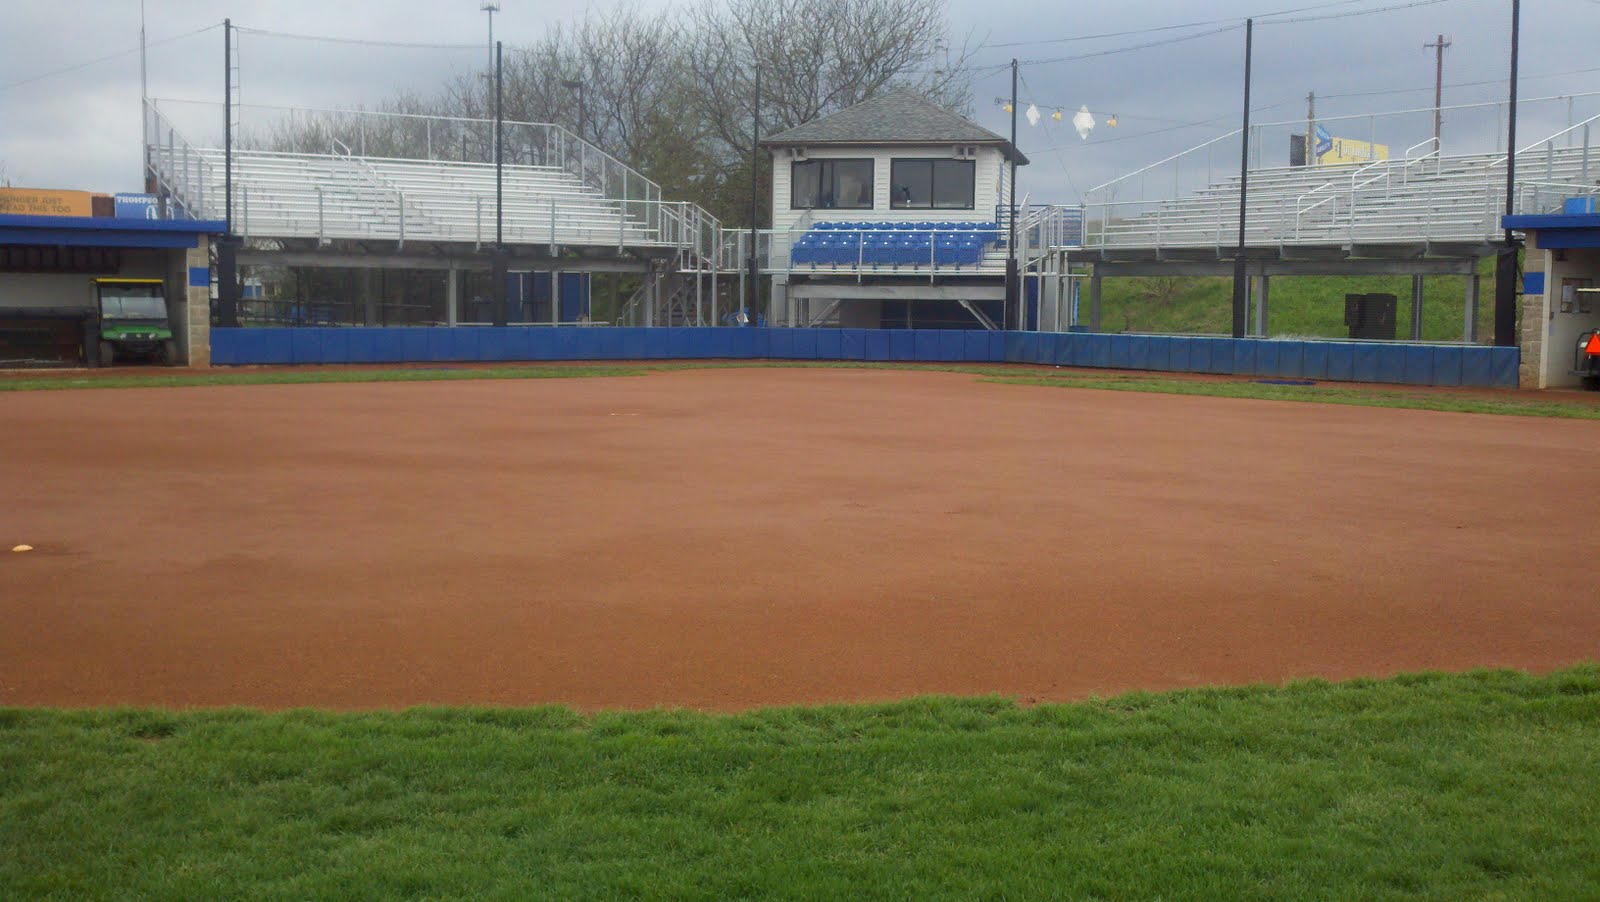
I made a stop at ISU yesterday and visited two fields maintained by Dan O'Brien and Sean Mang. Dan and his crew does a great job. The first photos show the renovated baseball field at Bob Warn Field at Sycamore Stadium. Field Turf was installed last spring in the infield at an approx. cost of $200,000.00.

Exterior facade:


From 2nd base:


From behind home plate


About 6 blocks away is the Eleanor Forsythe St. John Softball Complex • Price Field. This field was amended with Dura Edge Pro from the Natural Sand Company and J&D Turf in the fall of 2010. the cost of the project was approx. $6,500.00

From 3rd base:


From SS:


After .5 inches of rain yesterday, both fields were ready to play. Do you think a having a balanced infield mix affects the field after heavy rains?

To learn more about Indiana State Athletics, click HERE
To learn more about the facilities at Indiana State, click HERE
To learn more about Natural Sand Company, click HERE

Go to j-dturf.com to learn more about J&D Turf

Play on!
--Jamie

Sunday, April 10, 2011

More Giants Home Opener Photos

As promised, here are a few more home opener photos from AT&T Park.

The Giants enter the field pre-game:


A couple of photos during the anthem:


A photo from the outfield concourse:


Good luck to Greg and the Giants in 2011.

Go to j-dturf.com to learn more about J&D Turf.

Play on!
--Jamie

SF Giants - Vol. I

Sorry for the lack of posts since Tuesday. We were on the west coast to accomplish 3 goals last week. First of all, the wedding of San Francisco Giants Head Groundskeeper, Greg Elliott, congrats Greg! Secondly, a visit to check on the playing surface and some new practices Greg is implementing utilizing Natural Sand materials at AT&T Park, and finally, the Giants home opener.

In Volume I, the Giants home opener will be discussed. First of all, what a event! I have been to 15 major league stadiums, 2 World Series games, but never a home opener. The home opener at AT&T Park was a memorable one to say the least. The World Series Champions raised the first World Series pennant since the move to the west coast. The first photo shows Greg and his crew watering the field pre-game as the music group Train readies the on-field stage.


The next photo shows the Giants closer, Brian Wilson, running the World Series pennant to RF.


Raising the pennant.


To see a YouTube video of the pennant raising, click HERE.

For more info on the 2011 SF Giants, click HERE
For more info on the history of both the NY Giants and the SF Giants, click HERE
For more info on AT&T Park, click HERE

Go to j-dturf.com to learn morn about J&D Turf.

Look for additional photos of the home opener later today, and Vol. II, consisting of the playing surface later this week.

Play on!
--Jamie

Tuesday, April 5, 2011

Can I Renovate My Brickdust Infield? - I Have an App for That!

I get this question all the time, the short answer is YES.

Now, for more detail. I have included two photos below of two different fields in Noblesville, IN. The first photo shows an infield that was renovated by J&D Turf in the fall of 2008 at Noblesville HS. The field was 4 inches of brickdust. We added on truckload of FieldSaver 50 from the Natural Sand Company, blecavated the FS 50 into the brickdust, rolled and laser graded the infield. Finally the field was conditioned with two tons of Diamond Pro Professional Calcined Clay and one ton of Diamond Pro Red Infield Conditioner. The picture is from last week. The field is playing great. I call it a "hybrid infield". Not what I would do in the consulting/construction phase, but it gets the customer to a more typical infield surface for a third of the cost. The photo below the renovated field is a straight brickdust surface that has not been renovated. We have performed this process to in excess of 10 fields, and the all are doing really well.


Why are coaches wanting to elimate their brickdust? A few reasons:

1.When added to a field in excess of 1/2 inch brickdust becomes VERY loose when dry
2.Brickdust breaks down into a powder, calcined clays and vitrified clays will not
3.Brickdust stains uniforms
4.In Indiana, brickdust costs in excess of $100 a ton delivered. The FS 50 amendment alone was less than $100 a ton and it fixed the field!

Some facilities wanted to maintain a dark red topdressing. For those customers, we used a straight 1/4 inch of Diamond Pro Red Infield Conditioner.

The cost for a “hybrid infield” - approx $8,000-$10,000
The cost for removing the brickdust and replacing it with 4 inches of a good balanced infield mix - approx $25,000-$30,000

To learn more about renovating infields and adding new material into existing material click HERE and HERE

To learn more about Natural Sand, click HERE

To learn more about Diamond Pro, click HERE

Go to j-dturf.com to learn more about J&D Turf.

Play on!
--Jamie

Saturday, April 2, 2011

The Final 4 is Here - Go Dawgs!

The Final 4 is only a couple of hours away. So, what does that have to do with turf? Reliant Stadium has natural grass for the Houston Texans. The turf is a system of trays that can be moved in and out of the stadium. Why was this first considered? Have you ever heard of the Houston Livestock and Rodeo Show? How about an event that draws over 2,000,000 people in less than a month. This annual event means the field must be removable.

To see an article about the grass system at Reliant Stadium, click HERE

To see another article about the stadium and its turf click HERE.

To see an article about the Final Four set-up click HERE and HERE


For an article about extra events at the stadium, click HERE

To see information about the rodeo show, click HERE.

Play on!
--Jamie

Renovating a Mound on a Budget

Back to Avon South Middle School for renovating a mound on a budget. For this task, we had 50 bags of Dura Pitch Mound Clay and a new Jack Corbett 4-sided pitching rubber to install. A picture of the mound before we started this process is below


After tending to the edges (see renovating a home plate on a budget post for edging details) the task was to install the new pitching rubber 10 inches above home plate and making sure it was centered and square. The pitching rubber should be 60 ft 6 in from the apex of homeplate and each corner of the pitching rubber should be 59 ft 1 in from the corresponding front corners of the homeplate. Also, you will see a string line from the apex of homeplate to the middle of second base. The pitching rubber is center on the string line. To learn more about setting a pitching rubber click HERE.


After setting the pitchers rubber, the clay was added, once again with the concentration being on the slope of the mound, keeping in mind that we had limited clay due to the limited budget


Next, the new mound clay was tilled into the existing material


The mound was then sloped to spec - (i.e. - 6 inches in front of the mound was level with the pitchers rubber, and then falling one inch for every foot for the next six feet. To learn more about sloping a mound click HERE. A photo of the slope is below


After sloping the mound and building the table we boarded the rest of the mound in a similar fashion to the plate. Then we tire rolled the entire surface.

To see pictures of the tire rolling a homeplate and boarding of the plate click HERE and HERE.

1 1/2 hrs later, we have a renovated mound on a budget!


The bottom line is, with the correct planning and the right materials, you can renovate a mound and plate on a very limited budget. Cost of the materials for both projects - $920.

Play on!
--Jamie

Friday, April 1, 2011

Renovating a Home Plate on a Budget

As you can see from previous blog postings, J&D Turf travels to fields and facilities of all levels of play. Our company view is "Provide safe and playable fields for athletes of all ages and abilities." With this in mind, yesterday the J&D Turf crew was at Avon South Middle School renovating a home plate area. Obviously, with this being a middle school field, funds were limited. So, we renovated the home plate area on a shoestring budget. How did we do it? See below:

The photo below shows the installation of a new homeplate. It is difficult to see the string lines from each existing foul pole in the photo. The elevation of the homeplate was set via a laser to ensure positive drainage, i.e. - rain water will not run back onto the plate.


The next step was edging the plate. The plate was edged at a 15 foot radius. You can see the dashed painted lines showing the 15 ft mark. This field was not used for 10 years, so the edges are still a little inconsistent, but after all, sodding was not in the budget. Photos of before and after the edging below:


After edging, bring on the clay. For this project we used Dura Pitch Mound Clay from the Natural Sand Company. We only had 40 bags for this project, so we concentrated on the batters and catchers boxes, and added the remainder around the plate.


After adding the clay, bring on the tiller. A smaller tiller is just fine for this type of wrok to till the new material into the existing material to a depth of 3 inches.


After tilling, bring on the board! We used a 16ft long 2x6 to level the plate. One edge of the board was on the plate, the other edge of the board on our newly created grass edge. Three passes were made to ensure positive drainage.


Next, the plate was tire rolled. This is simply, using the weight of equipment to compact the soil. Ideally, the use of a three ton roller is the best application, but after all, we were on a budget!


After tire rolling, a quick rake and mat drag competed the plate.


Calcined clay topdressing was not added for this project due to the limited budget, but ideally 3-5 bags would be advised to topdress the plate area to a depth of 1/4 in.

The bottom line is, this process is not recommended at the higher levels of play, but if you have a couple of hours and a limited budget, there is an answer!

To learn more about Dura Pitch Mound Clay, click HERE

Go to j-dturf.com to learn more about J&D Turf

Play on!
--Jamie